by guest contributor Anna Gay

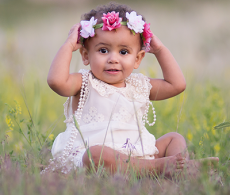
Backlighting can pose a huge challenge to photographers, and while it may seem a bit tricky to master, here are a few simple steps that can help you take advantage of backlighting, and use it to create a dreamy, ethereal look:
Expose for the Subject
The most important thing to remember when your subject is backlit is to make sure your camera settings are set to expose your subject, not the background. If you are shooting in Auto, most likely, your camera is going to expose for the bright light behind your subject, and your subject will be underexposed in the image.
Switching to full Manual mode will help you tremendously in this situation. This way, you can get the correct exposure on your subject. Since your subject is in shadow from being backlit, using Manual mode will help you get the correct exposure on them, and the light behind them will appear even brighter, resulting in that hazy light all of us love so much!
Reflectors and Fill Flash
Using a fill flash is a quick way to achieve the correct exposure on your subject, but keep in mind that you may want to use some type of diffuser on your flash in order to prevent harsh shadows on or around your subject. The amount of flash you use will depend entirely on how backlit your subject is, but in most cases, you will not need a lot of light from your flash in order to properly expose your subject. The key is to get just a tiny bit of flash on your subject so that the light appears natural.
If you are unsure about using a flash, a classic, silver reflector will work, too. The challenge with reflectors, though, is that you will need to position them perfectly so that they bounce the light onto your subject. This can sometimes be tricky, and you may need either a stand for your reflector, or an assistant to hold the reflector for you.
Post-Processing
While getting your shot exposed properly in-camera is the ultimate goal, sometimes, it doesn’t always work out that way. While there are many different ways to correct the exposure in post-processing, here are a couple of quick-fixes:
- In Lightroom – Using a Graduated Filter to increase the exposure on your subject is useful. Also, doing an overall adjustment to the Shadows and Blacks sliders will brighten your subject, while maintaining the bright backlighting
- In Photoshop – In your Levels adjustment panel, increasing the exposure on the Shadows and Midtones will brighten your subject.
Keep in mind that, when adjusting the exposure on your subject, you do not want to push the levels too far, as this will result in the dreaded digital noise issue, which may look fine on your monitor, but once the image is printed, the digital noise will become painfully visible. Shooting in RAW is also a good practice, as this will reduce a good amount of digital noise in your shadows, allowing you to make more adjustments to the exposure.
![]()
 About the Author: Anna Gay is a portrait photographer based in Athens, GA and the author of the dPS ebook The Art of Self-Portraiture. She also designs actions and textures for Photoshop. When she is not shooting or writing, she enjoys spending time with her husband, and their two cats, Elphie and Fat Cat.


Awesome pointers! I like to use fill flash off my camera to add some depth to the image. Its pretty easy to hand hold it and trigger with your pop up if you don’t have triggers. A nice upside is the pretty little catch light that are sometimes missing in back lit photos!