by guest Contributor Brenna Gentry
Fuzzies… not only do are they dreaded in real life, they also show up in images. Sometimes we don’t always have out trusty lint roller or tape. Sometimes it doesn’t even matter if we do… fuzzies can be STUBBORN. The technique I am showing you below is something I use for not only fuzzies, but also on hair, blown out or shiny skin, and many other things. As always there are 12 different ways to do things in Photoshop.. this is just my way. I hope it helps! Check out the 5 super quick steps to remove fuzzies from your images:
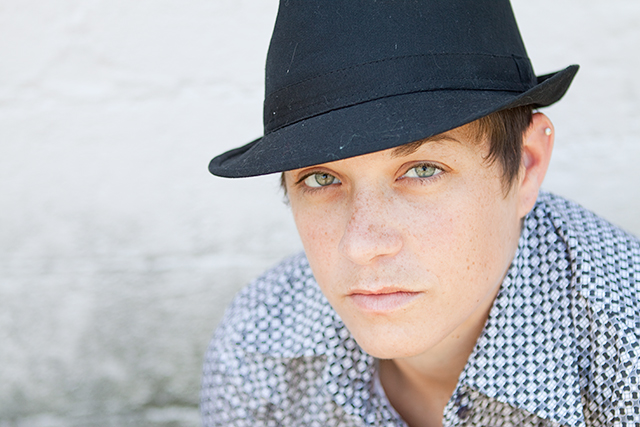
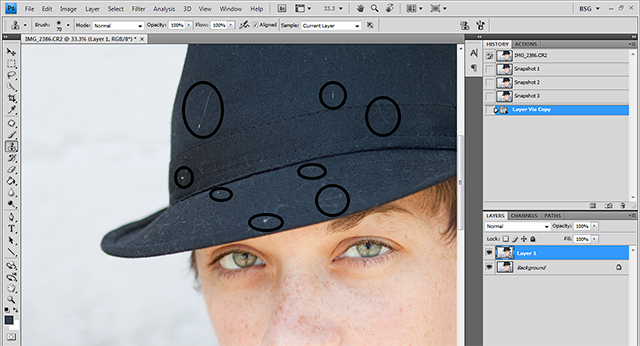
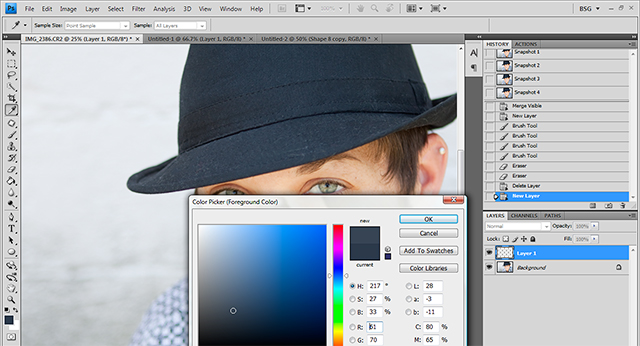
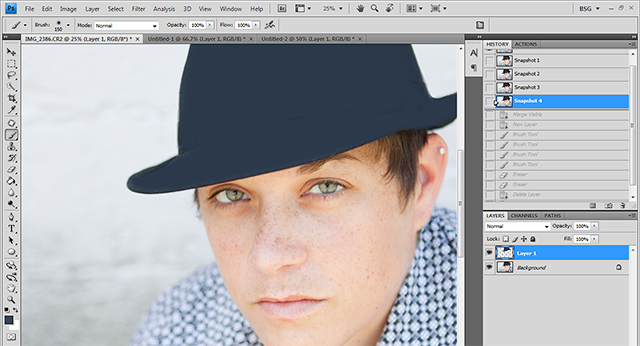
STEP 5- Once you have painted everything, change the blending mode of the painted layer in your layer palette to Darken/Darker Color(every now & then depending on what you are working on a different blending mode may work better, scroll through just to make sure, but these usually work for me). Then, adjust the opacity to your liking. You will want it to blend well., so not too strong.
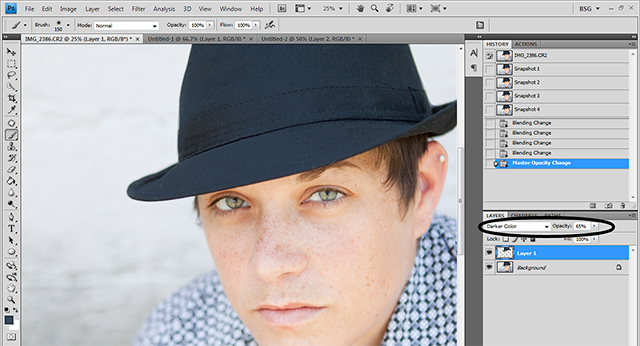
So that’s it! Now you would be able to edit the rest of the image. Big difference for sure.. don’t ignore the fuzzies 🙂

About the Author: I spend my days trying to balance work, quality time with my husband and son (plus two dogs), laughing on the phone with my wonderful friends and “ME” time which consists of really good TV shows, music and books. I love that I live in my hometown of Franklin, Tennessee and that it’s not a place I am trying to escape. I am so thankful to be able to follow my dreams and share what I learn along the way with other photographers!
Visit Brenna at her WEBSITE | BLOG | and FACEBOOK pages today!




Thank you so much for taking the time to share with us your talent and knowledge. Huge help!
Lily Miller
Thank you, Lily!!