by Guest Contributor Veronica Gillas
Newborn photography comes with its challenges, but getting harsh red tones out of images seems to be a particularly challenging task for some photographers. The trouble is that a brand new baby’s circulatory system isn’t developed yet, so getting blood flow to their extremities is a bit daunting for their little bodies. All that to say, letting a baby lay on their hand while you’re posing them can mean that you’re going to end up with a pretty bright red or purple looking arm.
Long ago and far away, I used actions to get the reds and purples out of newborns hands and feet. I was never 100% happy with the finished product though. However, since having learned how to edit by hand, I found a trick that lets me pull the red out and adjust until I am in love with the result. If you want to make your life easier, you can even create your own action using these steps and then adjust to taste.
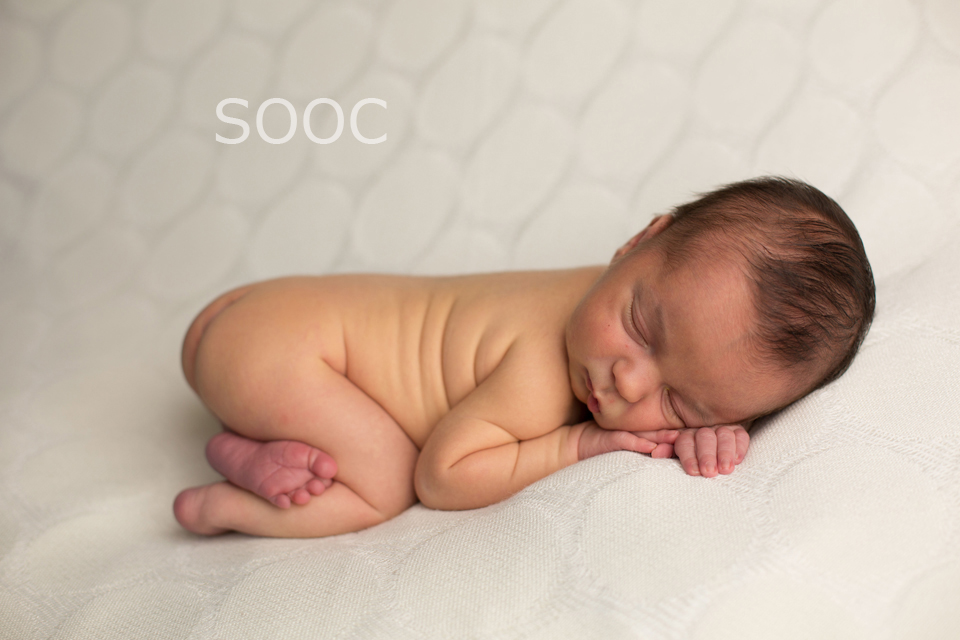
Here’s my SOOC image (isn’t he just the cutest little thing you’ve ever seen??). Take note of little man’s hands and his feet. His feet being tucked under his bum turned his foot red.
I have a few base adjustments that I apply to almost all of my newborn images. I use hue/saturation layers to pull some of the red and yellow out of the image first. As you can see, his foot and hands look a bit better, but they still need some work.

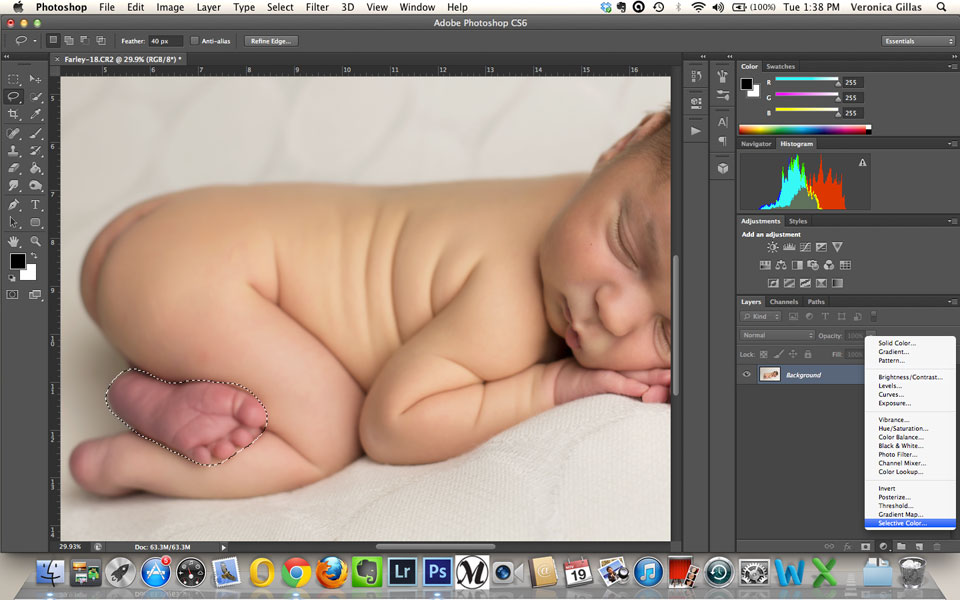
So, let’s select our lasso tool and loosely (it doesn’t have to be perfect) select his little foot. Then create a selective color adjustments layer and you’ll get a little popup window. By default, you’ll be working with reds, which is good because that’s the color we are trying to correct. You’ll see four sliders: cyan, magenta, yellow and black. I rarely slide the yellow one around, but if the foot is really purple, I’ll have to take out some of the cyan. For this particular image, I pulled out a bit of cyan (the base of his foot is purple), magenta and a touch of black. Then I do the same to his little hands.
Here’s my resulting image. Almost done!

Now doesn’t that look better? A few finishing touches, add my watermark and we are all set.
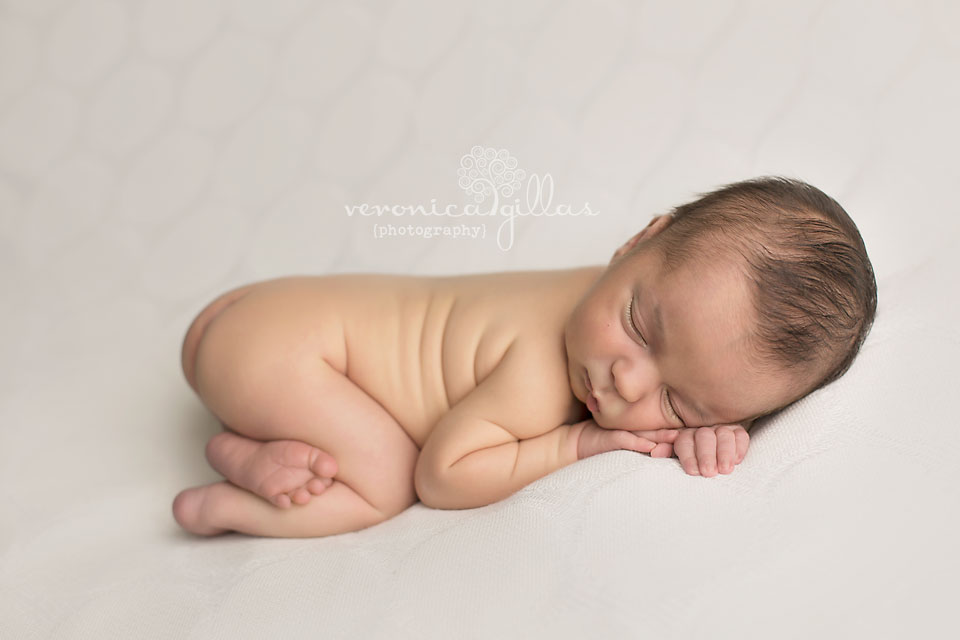
Gorgeous!
I am often asked what I use to make baby’s skin look so smooth and I do run Portraiture (at 50%) on all of my newborns. For flaky skin, blemishes and blotchies, I just use my handy dandy clone tool. You can also apply this technique to other color casts, not just red ones. Incredibly helpful for greens, too! Happy editing!
![]()
 About the Author: I am a natural and studio light photographer based out of Portland, Oregon. I specialize in the portraiture of newborns, families and children. I love playing ring around the rosy with our 6-year-old, re-enacting the epic light saber battle between Darth and Luke with our 9-year-old, and napping with our 8-month-old.





Awesome tutorial! Thanks for the tips!
Lovely! Thank you!
Thanks for the tutorial